Showing posts with label Elizabeth Golden. Show all posts

Sunday, 4 April 2010

Time Flies! The finished card


Here is the completed easel card for the workshop/tutorial that I have been waffling on about for the last few days.  I made this card for Ian, The Stamp Man, for his birthday.

I've used the new Distress Inks Stormy Sky and Pumice Stone

Hero Arts cling stamps Time to Stamp and Big Clock

Heart Wings Stamp from Tracey's AOD62 Artistic Elements stamp sheet

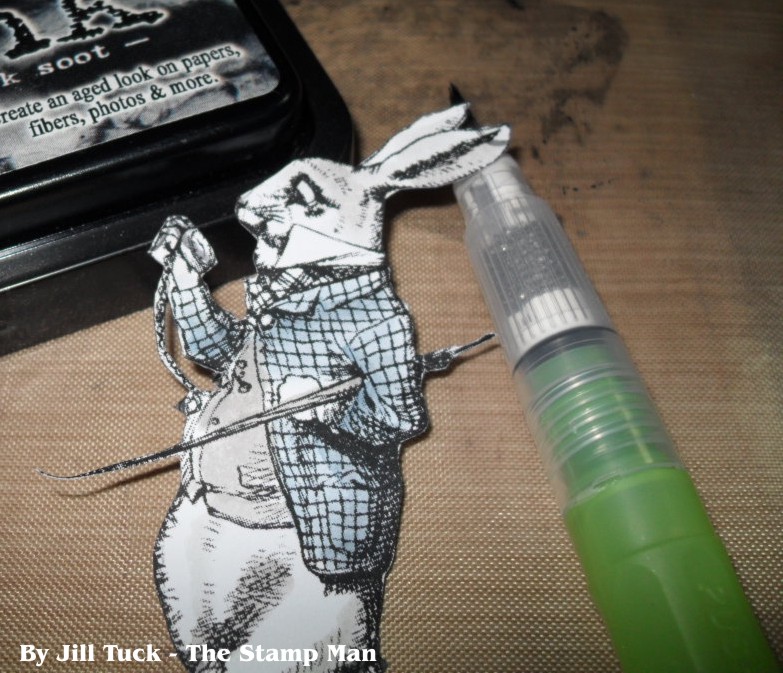
the rabbit image came from a collage sheet from Elizabeth Golden.

I've also used Tim's new Alteration Gadget Gears Sizzix die, the cogs/gears from Tim's Ideology, and my Cuttlebug amongst other things.

If you are interested in the workshop/tutorial you'll find it all listed in the labels section on my sidebar, it has lots of waffle and plenty of photos, so you can view all the flaws in close up, lol!!

I've decided to enter this into a couple of challenges, my first time of entering challenges.  They are the Allsorts Challenge Blog, the theme being no ready made design papers and also the Simon Says Challenge which is distressed.

Happy Easter!

Jill

Saturday, 3 April 2010

Time Workshop/Tutorial Part 5 - More images/words to add plus here's the finished card!!


Ok, here's the card at last!   Yes it's an easel card, surprise surprise!!

There are more elements/details to show but I think I've teased enough so thought I would show the card now.   The photo below is when it is closed. 


As I say, I will be explaining more things and also about making up the card in another post but for now there's some more elements to prepare...


I need to thank Elizabeth Golden for the white rabbit image which is from one of her Alice collage sheets.  Visit Elizabeth's blog The last door... down the hall, she has an amazing blog!!  The link will take you directly to the post with the sheets but I think you will want to have a good look around as there are various interesting things to read including some recipes.


Print off the image onto thin card (thin card is easier to cut out). 

I painted the image with the Distress Inks.  Transfer ink from the pad onto a non-porous surface, a craft sheet, old plate, or tile.  Then use a brush and water or waterbrush to paint the image before cutting out.  If you have a black or dark coloured pen, go around the edges of the cut out piece.  This gives a better finish as it hides the white edge of the cut.

Stamp out the wings from the winged heart stamp from Tracey's stamp sheet AOD62 Artistic Flourishes, paint and cut out.

The wording was printed from my computer, cut out then edged with the Stormy Sky Distress Ink. 

To attach the wings, I used silicone as there is only a small area which is fixed and it will give a stronger hold.


That's all for this stage, I hope you like the finished card!  I think it fits in well with the Alice/Steampunk theme that is current at the moment.

I'll be back with more details about the card, I hope you're still with me, I can assure you it is taking longer to explain than it took to make!

Jill